

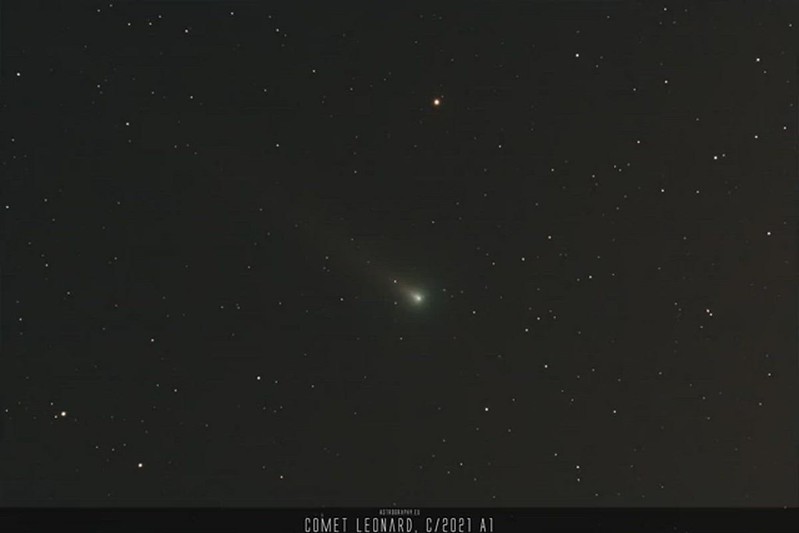
Making a time-lapse video of Comet Leonard: In december i did manage to take some exposures of Comet Leonard C/2021 A1. As usual, i did a standard process and got a very nice astrophoto.
Now, two months later i tested my first time-lapse video out of the 78x 30s exposures.
The time-lapse video on Flickr
1 hour in reality, 15 seconds in the time-lapse video:
Used software
I created the video using three software components:
- Deep Sky Stacker
- Affinity Photo
- PIPP
Deep Sky Stacker and PIPP are free to download software-packages. Affinity Photo is a Photoshop like, but lower priced and also very nice photo editing software. In this process Affinity Photo can be replaced by any other photo editing software. I did use Affinity Photo since i own a license and use it every time i work on my astrophotos. And the best thing: Affinity Photo can handle batch-processes. This saves a lot of time and makes things reusable by recording my own macros for processing the 78 single frames.
Steps needed
1st: It is necessary to register the frames and calibrate them as “usual“ – applying BIAS and FLATS in my case. But with some different options as usual. It is possible to crop the results in the same process, this makes things easier later on. This is all done in Deep Sky Stacker.
2nd: Take the calibrated, registered and in this case already cropped single files and make them nice and pretty. This can be done in any Photo editing software. The afford and outcome depends on the ability of the software and your skills using it. I did this in Affinity Photo.
3rd: Take all the edited and modified frames and make a video out of them. I did this with PIPP, since it is a software for astrophotography i got installed anyway on my machine for preprocessing planetary and sun videos.
Main steps in Deep Sky Stacker
I am not going to write a cooking receip using the software. I am explaining the “unusual“ and main steps.
In Deep Sky Stacker you use your Lights, Biases, Flats and other calibration frames as usual. You Check them all, register and compute offsets.
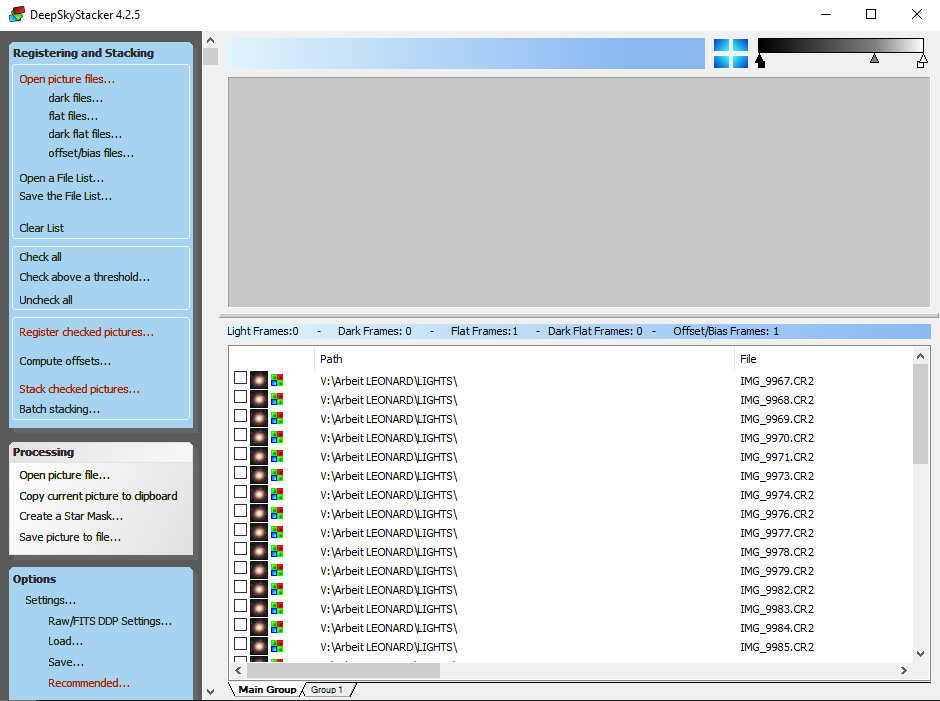
This being done, you must make sure to get registered, calibrated and cropped single frames. It is possible to get cropped files by selecting the intersection mode.

You can make DSS to saves the files for your further use by selecting the Create a registered/calibrated file for each light frame:
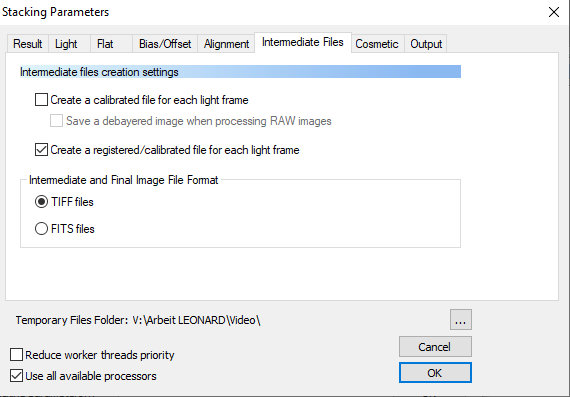
Photo editing
After the short and easy to reuse process in Deep Sky Stacker, you can edit ALL YOUR DSS modified light frames.
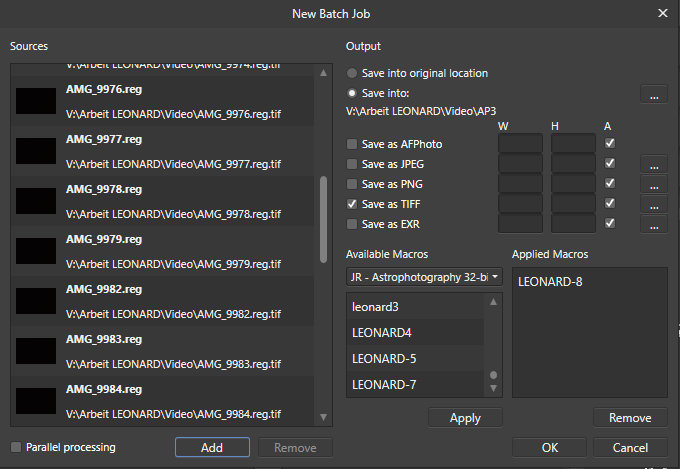
I recorded a macro in Affinity Photo on one of the 78 fames until the result looked nice. I used things like Denoise, Sharpen, some Curves, some color modification, the astro background filter, modified the size of the picture and pasted the font boxes. After saving the macro, I opend a New Batch Job, selected all the 78 frames DSS created, chose my macro and defined where and how to save the final files. I saved as TIFF for further use in PIPP. Important, that in TIFF options the compress option is set to uncompressed! Otherwise PIPP got a problem with it:
Making the video file with PIPP
After creating (in my case) 78 final pretty images, they needed to be put together to a video. I did this with PIPP.
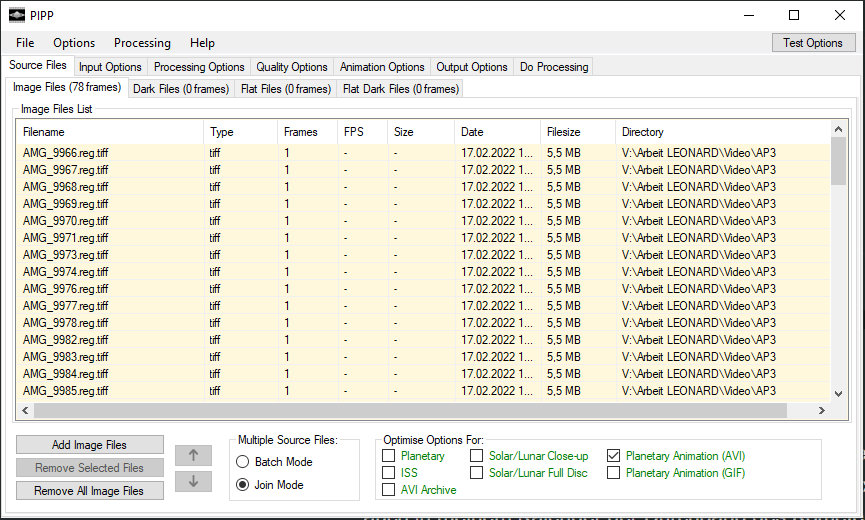
1st: open all the files and bring them into the correct order if needed. Choose Planetary Animation and Join Mode.
In the Processing Options Tab it is important to select NONE as Frame Stabilization Mode. The stabilisation was already done in DSS, especially if the Intersection Mode was selected in DSS:

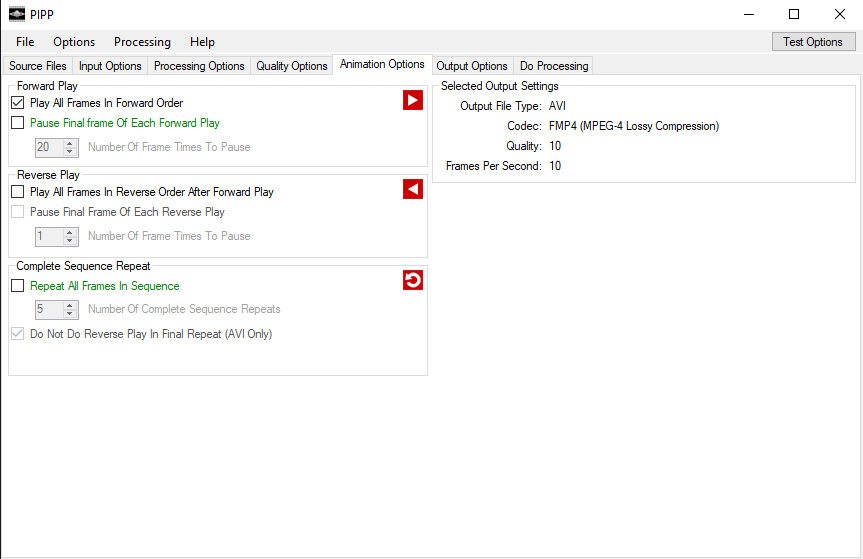
I deactivated all but Play Frames in Forward Order in the Animation Options Tab.
In the Output Options Tab i have chosen the Uncompressed AVI. But very important for me was to modify the frames per second speed by checking and selecting 5 as Framerate:

The process can be started on the Do Processing tab:
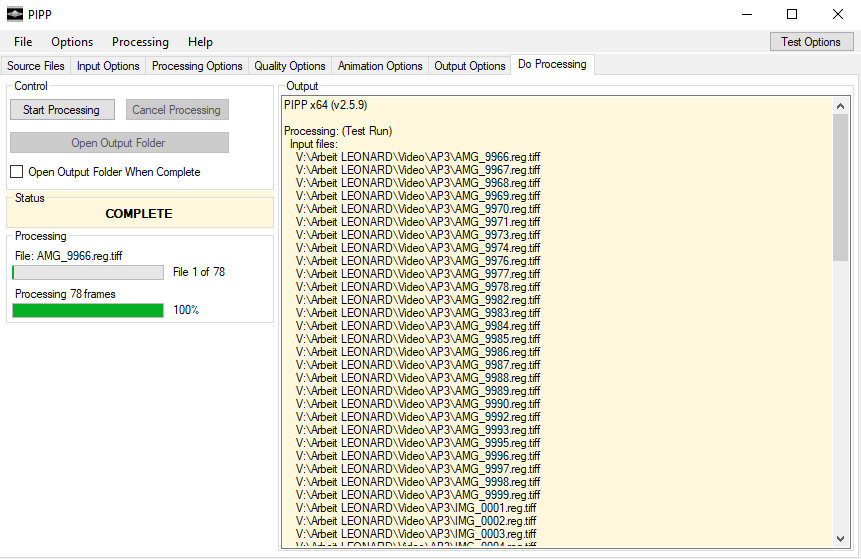
After that, i created my first time-lapse video using my Comet Leonard Frames.
As already mentioned, I did not describe every single step and klick. But i hope someone can use some of the information for his personal next step.
It makes me happy when you like this article and mention it as a comment.


