My decision-making process for the upcoming changes to my astrophotography equipment was lengthy and well-considered.
On this page, I summarize the fundamental and essential thoughts that led to my decision and provide references to the individual pages of my astrophotography components, which I selected very deliberately.
Here are the components – with links as soon as I have written the respective post:
- MONO Astrofotografie – was lange währt – Rahmenartikel
- ToupTek SkyEye62AM Hardware
- Baader UFC Filterschubladen-System
- Gerd Neumann CTU XT M54
- ToupTek SkyEye62AM Software
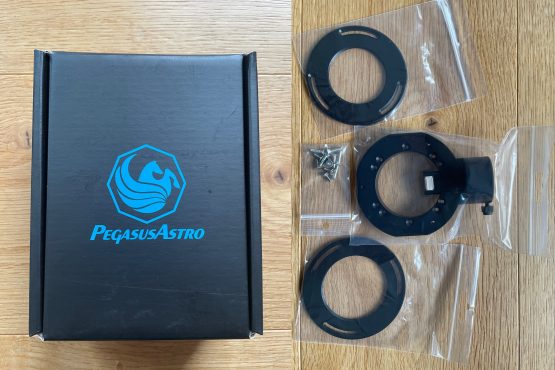
- Pegasus Astro Indigo OAG
- Baader LRGB CMOS Filter 50.4mm
Telescopes
I use two telescopes, and I plan to use my new mono equipment with both.
The specifics of each setup, including details about the optical configuration, will also be documented here.
- Baader APO 95/580 CaF2 Travel Companion
- Vixen VC200L – my Vehrenberg VISAC
I use the Baader APO with the Baader CaF2 M68 Field Flattener, which operates with a back focus of 76.11mm.
When using the Vixen VC200L my preference is using its native focal length of 1800mm. In this case, I don’t need to adhere to a fixed back focus.
Therefore, I will initially focus on adapting the mono setup with the Baader APO and will address the VC200L in the second phase.
Choice of Camera
Cooled Astro Camera or Mirrorless Camera (DSLM)
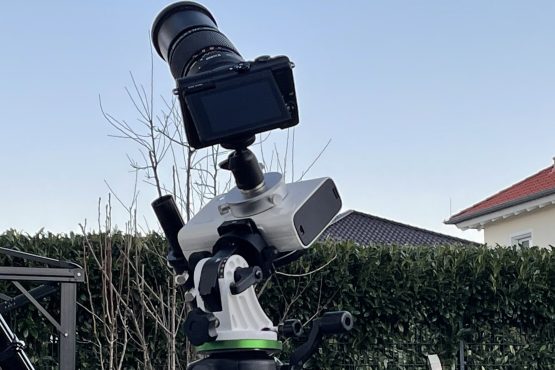
For the past few years, ever since I began amateur astrophotography, I have been using a mirrorless camera. Initially, the CANON EOS M100, and later the CANON EOS R – both in their astro-modified versions.
After transitioning to the Baader APO, the desire to match the camera’s quality to that of the optics quickly grew, leading me to consider switching to a cooled astro camera.
The results of astrophotography depend heavily on achieving the best possible signal-to-noise ratio. Only then can the details and intricacies of astronomical structures be effectively captured and processed.
As one part to achieve this goal, this requires lowering the sensor temperature. In a standard DSLR/DSLM, the sensor tends to heat up significantly above the ambient temperature due to the enclosed housing. A cooled camera, however, can operate year-round with a sensor temperature below freezing.
My decision: A cooled astro camera!
Mono or Color Camera
This is a question I pondered for a long time, one that is often discussed passionately – yet mostly rationally – within the astrophotography community.
Ultimately, everyone has to make their own decision and see how well it works for them. If in doubt, the choice may need to be revisited and corrected.
My decision: Mono!
Of course, I had to reason through this decision as well. Below are some of the questions and statements I repeatedly encountered and tried to answer for myself:
Statement:
Mono takes longer than color imaging with a One-Shot Color (OSC) camera.
My thoughts:
Yes, that conclusion can be reached. I like to break my response into three scenarios:
I) Imaging star clusters without significant nebula structures:
In this case, a single evening with an OSC camera is often sufficient. Sometimes, just 1 or 2 hours are enough to capture a beautiful open star cluster. Using an OSC camera is certainly the most relaxed option here. However, with a bit more effort, I can also photograph the cluster with a mono camera in the same time.
For me, the mathematical details lie in the color filter pattern of the Bayer matrix. A common matrix is RGGB, meaning 1/4 of all pixels capture only red, 1/4 capture only blue, and 1/2 capture only green light. If I base this on a 2-hour imaging session and calculate the exposure time across the full sensor area, I collect different amounts of photons for each color channel. For red and blue, I gather the equivalent of 30 minutes on a mono sensor, and for green, the equivalent of one hour.
With a mono sensor, I can freely allocate time for each wavelength. For example, I could expose 40 minutes per color channel in the same time and be done.
II) Imaging nebula structures or galaxies:
My current practice is to image over multiple nights anyway – 3, 4, 5, or even more nights are not uncommon. This was also the case when I used a mirrorless camera. If I assume a 4-night session of equal length with an OSC camera, the time distribution would be, as in Scenario I: 2 nights of green, 1 night of blue, and 1 night of red.
With a mono camera, I have full control over how I distribute my time. One option would be to capture all three color channels in a single night, spending 1/3 of the time on red, 1/3 on blue, and 1/3 on green.
The remaining 3 nights can then be dedicated to luminance. If I find the luminance exposure insufficient, I simply continue capturing luminance (everything) – not splitting it into 1/2 green, 1/4 blue, and 1/4 red, as with an OSC camera.
III) Narrowband:
With an OSC camera, I was typically limited to duo-narrowband filters. As long as you’re imaging an object that contains both wavelength regions, this approach seems attractive – I’ve done this myself to some extent. However, the filter works within a predefined ratio (analogous to Scenario I). For example, only 1/4 of the HA photons hitting the sensor actually get recorded, while the OIII photons fortunately use the remaining 3/4 of the sensor area.
But what if I want to isolate the HA surrounding a star cluster or the HA regions within a galaxy? Then I don’t want to use just 1/4 of my sensor area – I want to use the entire area!
The ability to capture not only HA and OIII but also SII is a clear advantage.
The flexibility to allocate exposure time individually for each wavelength (L, R, G, B, HA, OIII, SII) is the decisive reason for me to switch to a mono camera. This doesn’t mean I’ll forever abandon using OSC cameras. As long as the sensors complement each other, the advantages of both methods can be combined effectively.
Full-frame or crop sensor
The question of sensor size was quickly answered for me. I use two telescopes that clearly work well with full-frame sensors. There was really no serious doubt that it had to be full-frame again – I had already tested this successfully with my previous camera.
My decision: Full-frame sensor!

Choice of Sensor
Well, there aren’t many mono full-frame sensors available. Essentially, the choice is limited to the SONY IMX 455 sensor, which comes in both OSC and mono versions.
When searching for full-frame sensors, one might also come across the SONY IMX 410. Unfortunately, this sensor is only used in color cameras so far.
That said, I took longer to make this decision than one might think. The decision between mono or OSC ran more or less in parallel with my evaluation of the sensors.
The decisive factor for me was the pixel size. While the IMX 455 has pixels measuring 3.76 µm, the IMX 410 features significantly larger pixels with an edge length of 5.94 µm.
The 3.76 µm pixels fit much better with my Baader Apo, which has a focal length of 590 mm. With the larger pixels, I would be heavily undersampled – great for signal-to-noise ratio, no doubt – but I opted for well-sampled imaging. At my VISAC with 1800 mm focal length, I either move into oversampling or use 2×2 binning.
My decision: IMX 455 Mono Sensor!
Choice of Manufacturer and Astrocamera
Once all the foundational decisions were made, it was time to select a specific manufacturer.

One thing was clear to me: I didn’t want a product with a third-party label. It was important to me to purchase the camera directly from its original manufacturer.
I am not bound by compatibility to any specific manufacturer’s system, which gave me the freedom to choose any camera I wanted.
Currently, I use INDI/EKOS on a Raspberry Pi 5, so INDI support was crucial. While I cannot rule out using NINA in the future, I ensured compatibility with that as well. For the most part, this shouldn’t be an issue for most manufacturers.
Cost is, of course, always a consideration. Why pay more for the same performance? I am 100% confident that the camera I’ve chosen will meet all my expectations.
My decision: The ToupTek SkyEye 62AM
Details will follow in the corresponding blog post.
Choice of Filter System
Filter Wheel or Filter Drawer
Now, I want the chosen ToupTek SkyEye 62AM Mono full-frame camera to be illuminated with the wavelength of choice as seamlessly as possible, without any shadowing.
So, filter wheel or drawer?
Honestly, price plays a minor role in this decision. High-quality filter drawer systems, including the seven filter drawers ultimately required, can cost as much as standard filter wheels.
What matters most to me? Quality! This can undoubtedly be found in both filter wheels and premium drawer systems.
I quickly gravitated toward a filter wheel – fully automated, and the usage would likely be as convenient as that of a one-shot color (OSC) camera, or so I thought. If I were primarily photographing from my backyard, I probably would have opted for a filter wheel.
However, mobility is also a crucial factor for me. I use my Baader Apo 95 CaF2 580 with an off-axis guider (OAG). In compact setups, the components of the OAG and the filter wheel ideally point in different directions. Choosing a transport case for the Apo took me a long time, and while it’s spacious, it doesn’t have room for a filter wheel.
Additionally, a filter wheel introduces a potential additional point of failure, at least in theory.
My decision: Filter drawer instead of filter wheel!
And what about swapping filters? Well, astrophotography is still very much a hands-on hobby. Changing a filter every now and then won’t overwhelm me.
Moreover, I plan to photograph narrowband and RGB data from my backyard, while luminance data will primarily be gathered under dark skies. For those trips, I genuinely value being compact and lightweight. After all, I chose the Baader Travel Companion as my Apo for good reason!
Choice of Manufacturer and Filter Drawer
The selection of potential manufacturers narrows quickly once I apply a few criteria:
- High quality
- Modular system
- Support for full-frame-compatible filters
- Flexible connection options
- Slim back focus
To be honest, after these criteria, my decision was already clear. The final confirmation came with the ability to accommodate 50mm filters.
My decision: The Baader UFC System!

Further details will follow in the dedicated blog post.
Choice of Filters
To begin with, I’ll start with filters for Luminance, Red, Green, and Blue. Narrowband filters – HA, OIII, and SII – will follow once the system is properly adjusted and running stably. This also allows me to spread out the costs over time.
Choice of Manufacturer and Filters
LRGB filters are offered by many manufacturers, as are the corresponding narrowband filters. However, the decision became straightforward once the appropriate criteria were applied:
- An experienced manufacturer
- “Ultra” narrowband filter variant with even tighter bandwidths
- Availability in 50.4mm size
Honestly, I’m not sure if any other manufacturer can truly compete with Baader Planetarium in this regard.
Filter Size
I opted for the round 50.4mm filters. While the 2″ filters are slightly smaller, they might introduce unnecessary vignetting on a full-frame sensor depending on the working distance. That would frustrate me immensely. The square 50mm filters Baader offers would also work excellently with the Baader UFC System. Although those filters are more suited for sensors larger than full-frame, bigger is always better!
Ultimately, practicality and foresight won out. The 50.4mm round filters fit all common filter wheels. If I ever change my mind about using a filter drawer or want to experiment with a filter wheel, these filters will remain compatible.
Additional Reasoning
One simple, yet significant, factor further solidifies my preference for Baader filters:
Filters extend the optical system’s back focus by 1/3 of the filter thickness. While many manufacturers’ filters are 2mm thick, Baader Planetarium’s filters are 3mm thick. I have yet to encounter a fine-tuning spacer ring for 2/3mm adjustments, but 1mm rings are common. This small detail ensures easier adjustments to my setup.
My decision: Baader Planetarium CMOS-optimized LRGB Filters—50.4mm

Details will follow… once I’ve captured enough photons.
Tilt Unit
A tilt adjuster is a must for me – true to the motto: Solve problems I don’t even have yet.
Why a Tilt Adjuster?
Tilt, no matter how minimal, likely exists in every optical system. Sometimes it manifests; other times it doesn’t. Its impact is determined by factors like:
- The level of precision expected from your telescope
- Sensor size
- Pixel size
- The love for fine-tuning in astrophotography
- Maximizing my Baader Travel Companion’s potential: My goal is to achieve the best possible results from this premium telescope.
- Full-frame sensor with small pixels: Any minor tilt will inevitably become visible on such a demanding setup.
For these reasons, I planned to integrate a tilt adjuster into my system from the start. Retrofitting one later into an established optical train is both a hassle and avoidable with proper foresight.
Choice of Manufacturer and Tilt Unit
I became aware of Gerd Neumann’s specialized products some time ago through glowing reviews from satisfied customers. His tilt adjusters, in particular, caught my attention for their precision and reliability.
When it came time to implement my mono upgrade, Gerd Neumann took the time to provide detailed advice via phone and email. His expertise and the quality of his solutions made the decision straightforward.
My Decision: Gerd Neumann CTU XT M54

I selected the M54 variant in the slim 11.3mm version. Its precise design, compactness, and adjustability align perfectly with my setup.
How the adjustment process goes (or went!) and why I chose this specific model will be detailed in a future blog post.


