
Or: An Unexpected Journey … with a Happy Ending?
… and how that could have been prevented …
I had already provided a detailed account of the complex transformation to my mono setup on my Baader Apo.
So, I had every reason to look forward to the first light and the upcoming first project. Unfortunately, some paths are rougher than one might expect – and the devil is in the details!
Fear After the First Light
For the first light, I deliberately wanted to keep it simple and focused on collecting the material for a photo in just one evening. On one hand, only one night of clear skies was forecast – on the other hand, I wanted to collect a complete set of LRGB data to test a mono workflow for the first time.
The workflow was purposefully developed, and the first version of the image from the first light was quickly created.

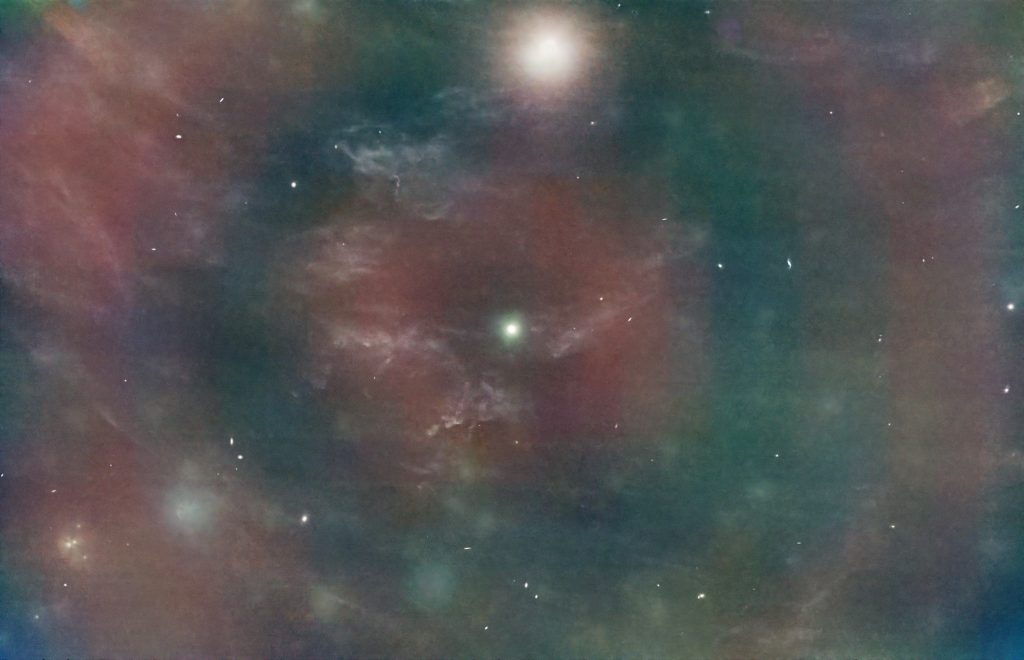
In this “original” version, a large dark ring can be seen or at least faintly perceived. I didn’t have any concrete “evidence” yet that something was wrong – but I already had my suspicions.
Later, I was able to salvage the first light image using masking and layering techniques in Affinity Photo, at least to the point where the flaw wasn’t immediately obvious. … But that’s not the focus here.
Cruel Certainty After the First Project
Well, more accurately: During the first project. I will definitely complete the project with clean data!
To start the first project, I traveled to the dark skies of the Eifel region at the Hoher List Observatory and was able to spend the night there. This made one thing clear: Any issues I encountered would be due to the optical system itself and not the surroundings!
Even in the EKOS preview, the lights already looked very strange and unusual.

During the development process, the certainty slowly crept in that there was a problem somewhere. – It was incredibly frustrating!
The issue became visible both in the final image and, in particular, in the red channel.

Troubleshooting and Flat Optimization
I spent many days optimizing my flats. Different ADU values, various light sources, separate flats for each color channel, very different exposure times for the flats… nothing helped at all!
The integrated master frames looked perfectly flat, clean, and well-corrected. Both before and after gradient removal. But there was nothing to remove! The errors simply didn’t become visible at any point in the process. The only exception was the massive error in the red channel – that was immediately noticeable.
After many days, I was certain that it wasn’t that I was too incompetent for mono, but that the problem lay within the system itself, and that it couldn’t be corrected with flats.
Troubleshooting the System
My Baader Apo 95 has been in use for over a year, and before the mono conversion, it worked with a full-frame camera without any issues. The Pegasus OAG was already part of the system at that time as well. So, I ruled out those two components as potential sources of the problem and narrowed it down to newly added components. These included the Baader UFC system, the Gerd Neumann Tilter, and the ToupTek SkyEye62AM.
I had also mentally ruled out the camera. It simply provides too clean darks, flat-darks, and flats (without optics).
So, what to do next? I was quite puzzled – the only thing that came to mind was simplifying the optical system in its complexity to make troubleshooting easier. The simplest solution was to remove the OAG. While I didn’t see it as the cause of the problem, sometimes you try anything in desperation.
The modification resulted in changing the order of the components, and I was able to remove one of the two M54 extension rings.
The Eureka Moment
It was during this modification and the alignment of the components that I realized where the error was.

One of the two remaining M54 extension rings was shining like a fairground light against my monitor! In contrast, the Baader extensions that were also installed were clearly very low in reflection.
At least it was immediately clear how to proceed from here.
The Path to the Solution
The system had already been modified and re-aligned. So, I assembled it again and took a few flats as a test, just to see if there was any visible change from removing the second extension ring.
And indeed, there was.
Since the Baader extensions proved to be extremely black and low in reflection, I ordered an M54 extension ring from Baader to start with.
As soon as the ring arrived, I removed the remaining glowing ring and replaced it with the Baader ring, then took a few flats again for testing.
Here, though, is the direct comparison of the two M54 extension rings.

The Comparison of the Flat Frames
Here is the direct comparison of the flat frames from the 3 different versions of my optical system.
In all three cases, these are single frames that I stretched enough for the relevant problem areas to become visible. In all cases, I applied the same stretching.
Version 1: The optical system as it was originally used for the first light and the first project. So, with two installed extension rings, where I currently suspect the source of my problem.

Version 2: The optical system reduced to the essentials, with only one of the two original extension rings installed.

Version 3: The optical system without further modifications, only the problematic ring was replaced by the M54 extension ring from Baader.

Next Steps
I will now continue my project with this exact configuration – whatever that means for the previous material. Then, I’ll spend 2-3 evenings taking astrophotos using a guide scope instead of the OAG – that works too. If the result turns out as I currently hope, I will order a second Baader M54 extension ring and restore the optical system to its originally intended configuration.
Interim Conclusion
I’m not finished yet, and the proof under the sky is still to come – but one thing is clear: Astrophotography and a high tolerance for frustration go hand in hand. – And I shouldn’t skimp on seemingly insignificant accessories!


