… not a guideline, just a list and some ideas or maybe hints.
It is now time to make a list about astrophotography guiding and some possible steps that might improve you guiding if you are looking for experiences of others who stumpled around – a lot – like I did.
Im my case I am using a german equatorial mount, a Sky Watcher HEQ5 PRO.
Disclaimer
I am not a guiding pro! But I learned a lot and tested even more. This article is in no way complete. I just want to share the steps I went through.
Polar Scope calibration
The polar scope needs (!!!) to look into exactly (!!!) the same direction as the axis of the mount. I learned it Youtube video of “Martin’s Astrophotography”: Skywatcher HEQ5 Polar Scope Calibration – YouTube
Polar Alignment
Polar Alignment sounds so easy these days. Grab your mobile app and see where polaris needs to be in the polar scope.
For me it is not all that easy as it sounds. I am using a tripod and I sometimes use it at different places but also very often in my garden. A mobile compass app is often enough to find the north. But sometimes it was not, even in my garden.
I used 3 paving stones in my garden on the grass to make it crystal clear where the tripod legs need to be to look north and always got polaris in the field of view of my polar scope.
After that, I use the PS Align Pro mobile app to find the correct position for Polaris.
Polar Scope rotated reticle
Is the polar scope reticle rotated? If so, you need to take this into account, even if its only a little bit. The PS Align Pro App got little helpers for this Problem.
Leveling the mount
A very good leveling of the mount is an abolute “must do”. I always use a spirit level.
Hard underground for the tripod
Once I used my tripod on grass because I forgot 3 wooden shelfs at home. I have got no results from that clear sky night.
Using UV/IR Cut filter
Using an UV/IR cut filter on my color guiding camera did improve my guiding. Once I forgot that filter and was wondering about the bad results.
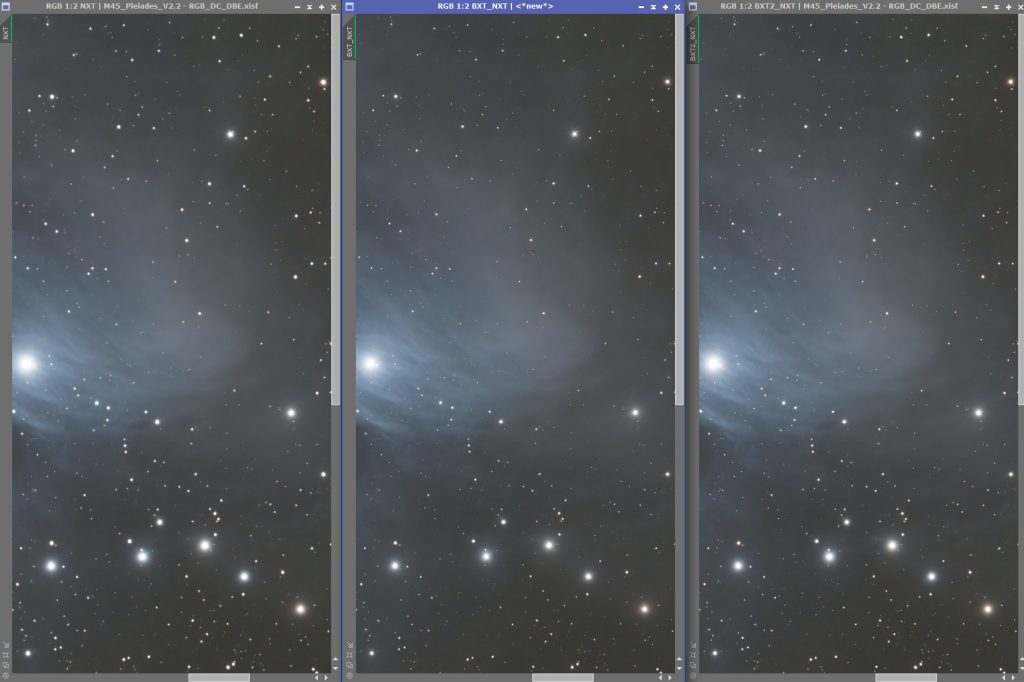
Exact focus on the guiding scope
For a long time I tried to get into focus with just looking at the size of the stars in the guide monitor. This was ok, but using a small Bahtinov Mask some day showed me, that I was not perfectly in focus.
For me, using a small mask was an improvement. I use a 60mm guide scope and had a self printed 50mm Bahtinov Mask. It worked well when I just layed the mask directly onto the guide scope lens for the focusing process.
Exact guidescope focal length
Every guiding software needs to know the focal length of the guide scope to calculate the correction signals for the mount. I am using a 240mm guidescope. But after I did a platesolve for that scope/camera combination, the result was 226mm. This is the value I now use in my guiding software.
Eliminate or reduce backlash on the mount
I think there are Youtube videos for most common mounts. I used these from “Frosth Astrophotography” for my HEQ5:
Check and adjust the backlash on a SkyWatcher HEQ5 Pro equatorial mount part 1 – YouTube
Check and adjust the backlash on a SkyWatcher HEQ5 Pro equatorial mount part 2 – YouTube
Dark Library in the guiding software
I think a “dark library” is also a nice thing if your guiding software supports this.
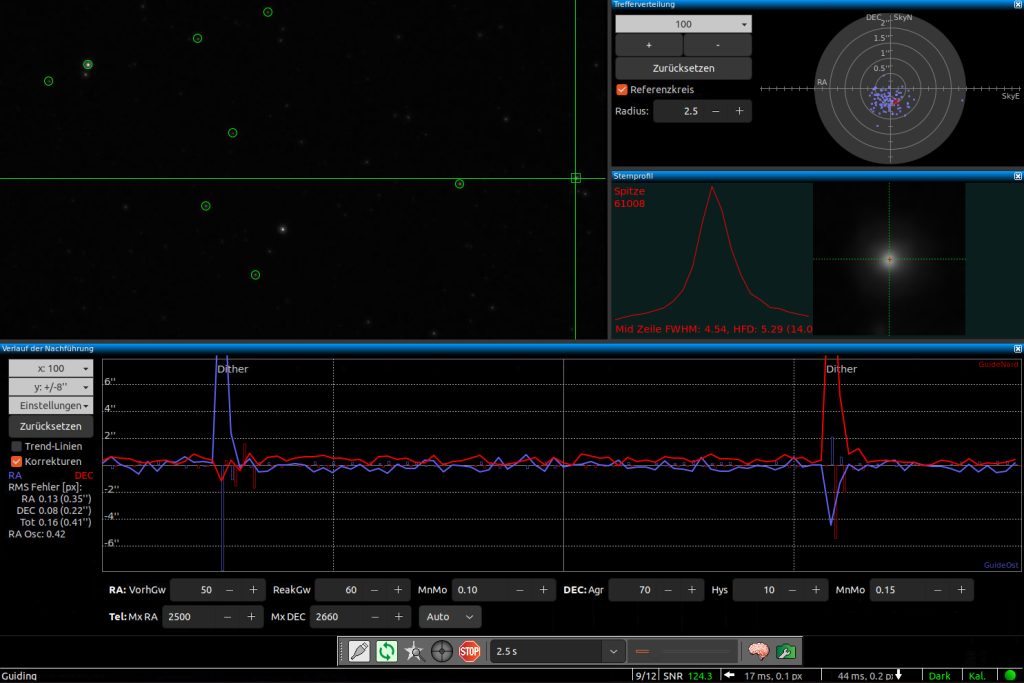
Multistar guiding
Use multistar guiding if your software supports it.
HEQ5 PRO specific
I use a Sky Watcher HEQ5 PRO mount. I like its weight and mobility.
Rowan Belt Mod
One thing I did, was an upgrade to the Rowan Belt mod. I think it was a nice improvement for this mount. I used a video from “Frosth Astrophotography”: Install the Rowan belt modification kit on your HEQ5 Pro equatorial mount – YouTube
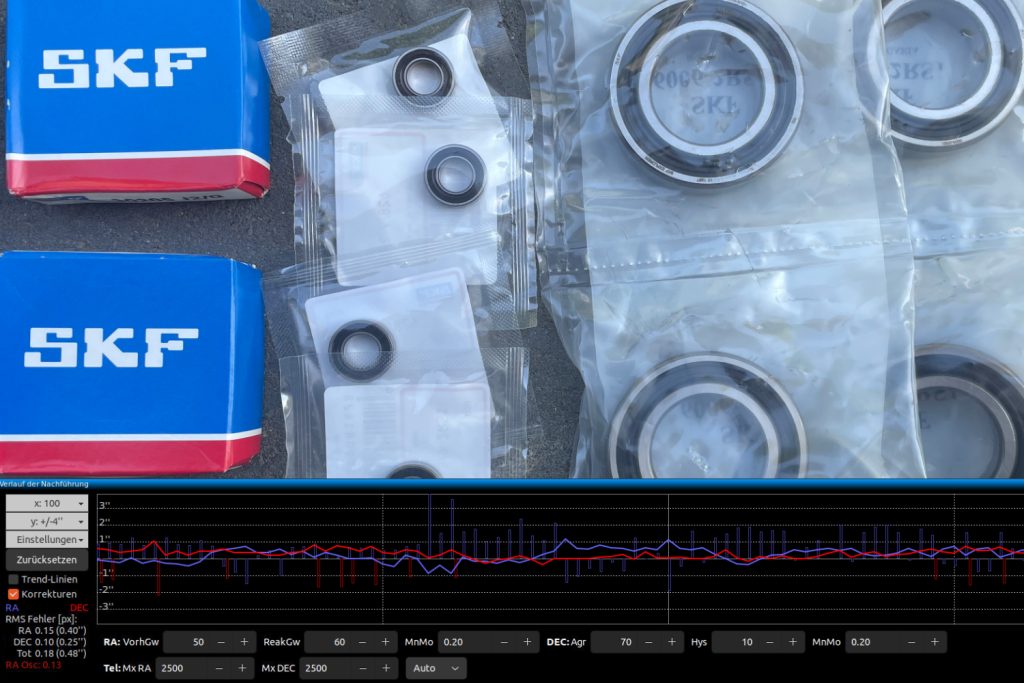
Hypertuning for the HEQ5 PRO
Hypertuning for the HEQ5 PRO mount means: Exchange all ball bearings and use new grease.
For me it made a huge difference and it was worth it. I used two videos:
Again from “Frosth Astrophotography”: SkyWatcher HEQ5 Pro hypertune – complete rebuild with SKF ball bearings – YouTube
And from “Astrobloke”: HEQ5 Pro Hyper Tune. Get the best out of your Sky-watcher EQmount. Now guiding 0.4 total rms – YouTube
I wrote down my results and the parts (ball bearings and grease) I used:
https://astrocamp.eu/en/sky-watcher-heq5-pro-hypertuning-2/